Water-cooling has two big advantages. It does not make any sound and the heat
transfer is very efficient. Today's high performance computer components use
a lot of power and thus produce a lot of heat. To fight, this you need the combined
effort of a large heat sink and a big fan, preferably more than one. This of
course makes your system very noisy, which is a problem if you use your PC almost
day and night. There is also a disadvantage, water-cooling doesn't come cheap.
You can save by using a cheaper pump, creating the water blocks yourself and
using an old car radiator.
I tried using a cheaper pump, but as you will read later on, this was not a
great success. For creating your own water blocks you need the proper tools
and skills, both if which I lack. It is pretty much the same story with the
radiator. The connectors are often different and would require a lot of work.
There is also always a risk using second hand equipment. So I chose to go for
new parts (and especially designed for the computer). Everything included, I
spent somewhere between €350,- and €400,-.
On this page you will find a photo documentary of the building of my new computer
and the installation of the water-cooling. You can click on a picture to see
a larger version of it. I hope you have as much fun reading this page as I had
building my new computer :-) If you have any questions or remarks, feel free
to drop me an e-mail.
This page is also available in Dutch.
Deze pagina is ook in het Nederlands
te bewonderen.
 |
|
 |
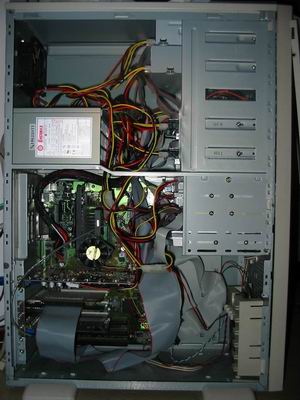
| My old PC, an Intel Pentium III
650 @ 728 MHz. For full specifications have a look here. With 7 fans, 2 case fans, 2 in
the PSU, 2 CPU HSF and 1 on the video card plus two 7200 rpm hard drives,
it's quite a noisy beast! |
|
A close-up of the old motherboard
and the cable chaos. Especially the SCSI cable makes it difficult to have
a decent airflow. Notice my first-ever mod: the second 4 cm fan I 'fixed'
on the CPU heat sink.
|
 |
|
 |
|
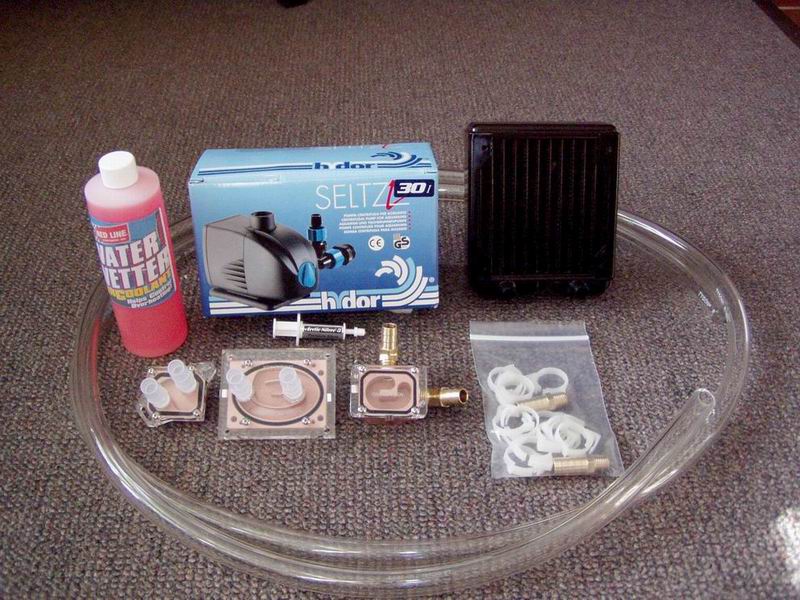
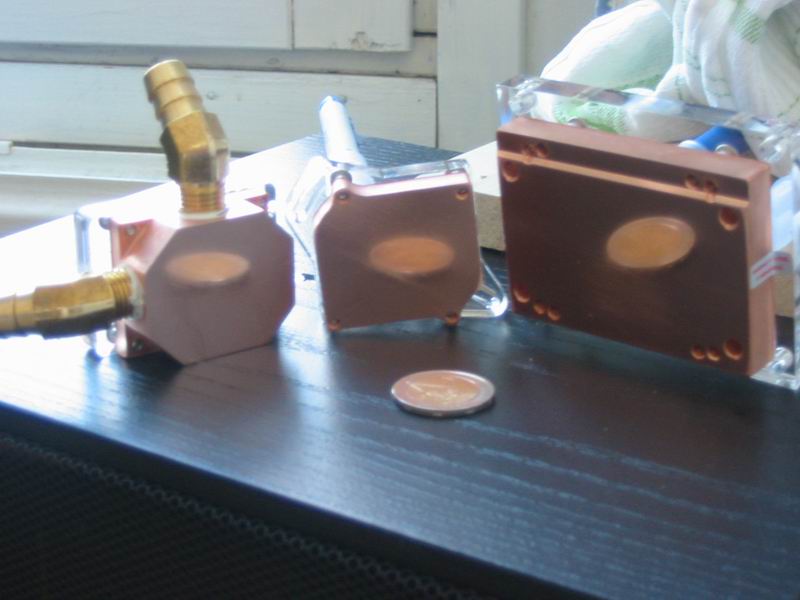
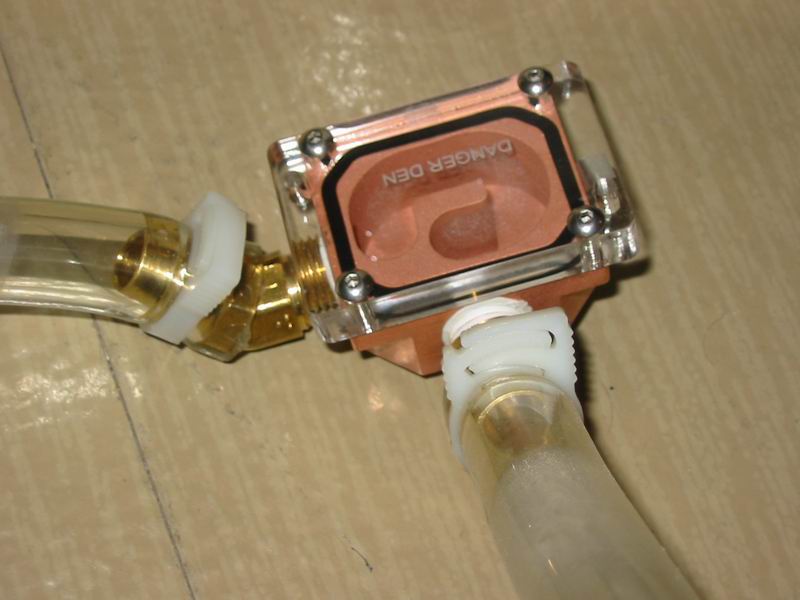
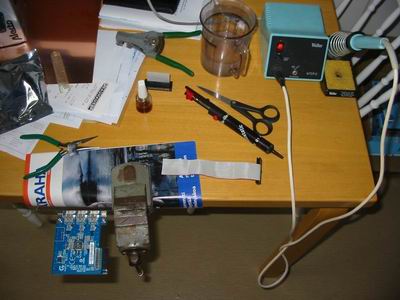
All the cooling bits were bought from Danger
Den while I was in the USA for 5 weeks (saved me quite a few bucks!).
- Maze 3 CPU block
- Z-chip block
- Radeon 9000/9700 pro block
- Hydor L30 1200 l/u pomp (110V, to be used in combination with a voltage
converter for use on the European 220V power grid)
- Black ice xtreme radiator
- 3 m Tygon R-3603 slang (12 mm ID, 18 mm OD)
- Water wetter (improves heat transfer and prevents corrosion)
- Artic Silver III thermal paste
- 12 hose clamps + 2 brass fittings (for the reservoir I am building myself)
All parts have a 1/2" or 12 mm fittings.
|
|
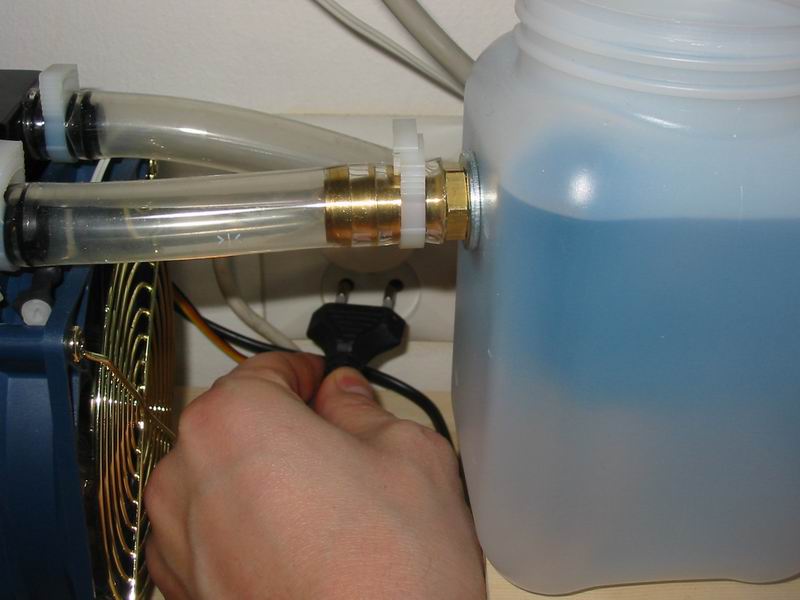
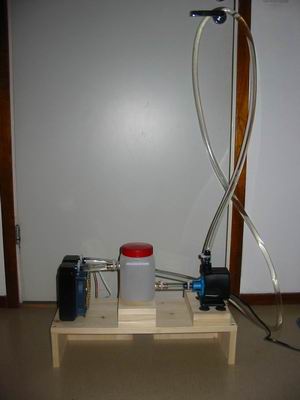
The pump, radiator and reservoir will be placed outside my case. For
this I made a table that will be placed directly behind my PC on the floor.
Here you can see it during the so-called "wet test". I let it
run like this for 24 hours to check for things like noise, leakage and
heat.
I was very happy with the performance of the pump and it didn't make
too much noise. There was just a little hum and somewhat of a soft rattle.
However, the voltage converter ran extremely hot after a couple of hours.
So hot that I feared leaving it running while I am not at home. This was
a problem because I sometimes have to leave it on that long. I contacted
the importer in my country, but unfortunately there was nothing they
could do for me, so I had no choice but to buy a new pump. Little did
I know that the pump problems were far from over...
|
 |
|
 |
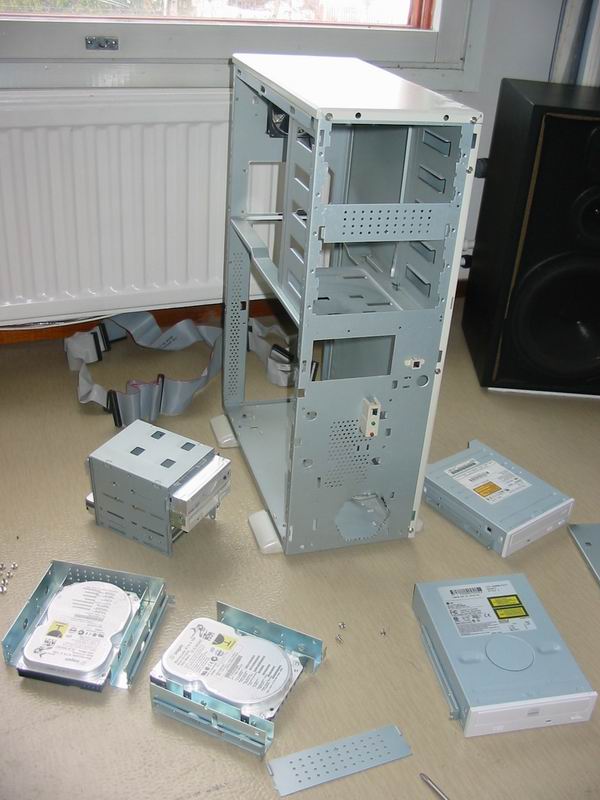
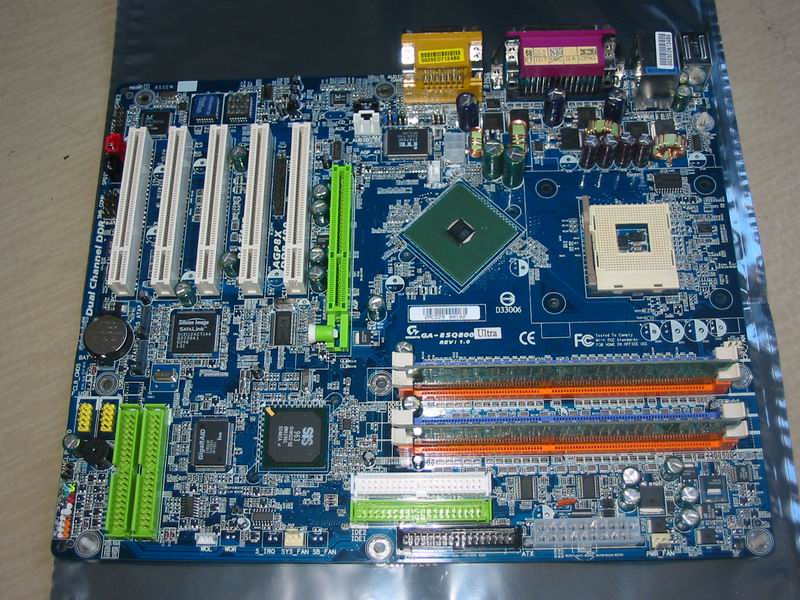
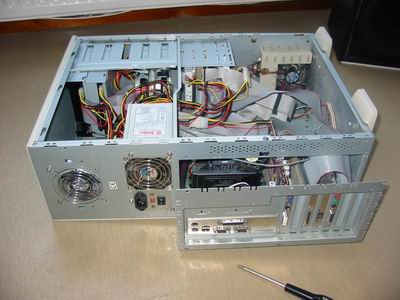
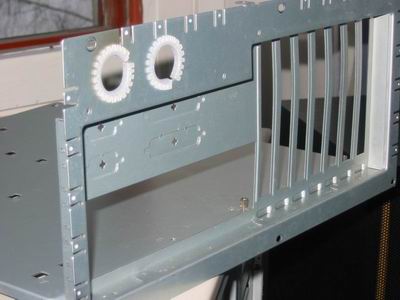
After all the new parts had finally
arrived, I could start assembling my new computer. I started with removing
the old parts by taking out the motherboard tray. I bought this case a long
time ago from a small company called Curbs that unfortunately does not exist
anymore.
|
|
Everything can be taken out easily.
The drives, for instance, are mounted on rails and are secured in the front
by only two screws. After everything was taken out, I gave it a thorough
cleaning, even the inside of the PSU. |
 |
|
 |
Even though I was first going to
run without water-cooling, I already made holes in the case for
the hose. The reason for not using water-cooling is that I needed to make
sure all parts were good, because removing the chipset and video card fans
(officially ;-) voids your warranty. I also wanted to know temperature and
noise levels for comparison. My biggest drill is 10 mm, so the rest I had
to do with a grindstone.
|
|
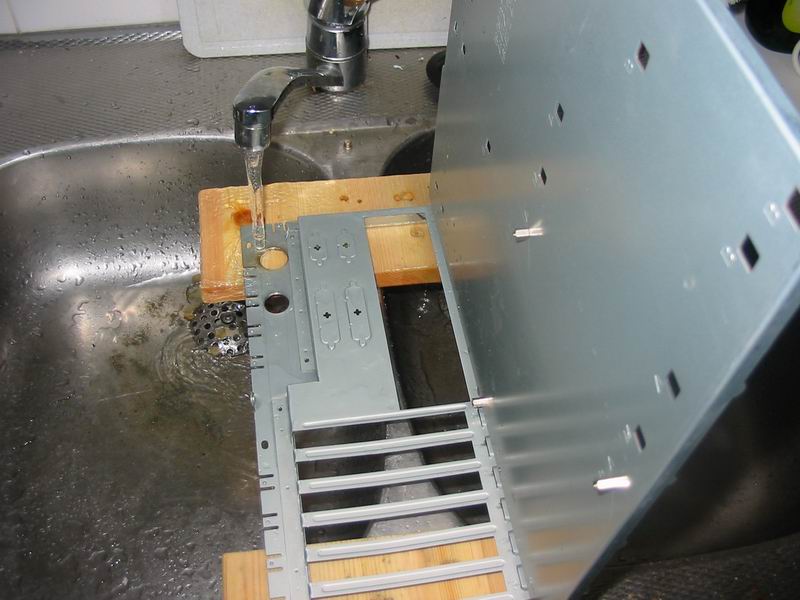
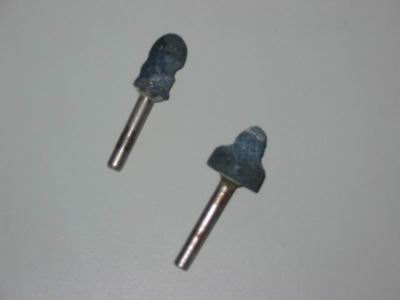
The grindstone ran very hot, you
can see the steel around the hole got all colored. So I decided to do the
work in the kitchen, cooling the case while grinding under running water. |
 |
|
 |
|
And here is the end result. Even though the edges did not feel that sharp,
I used a protective plastic strip, for a nice finishing touch.
|
|
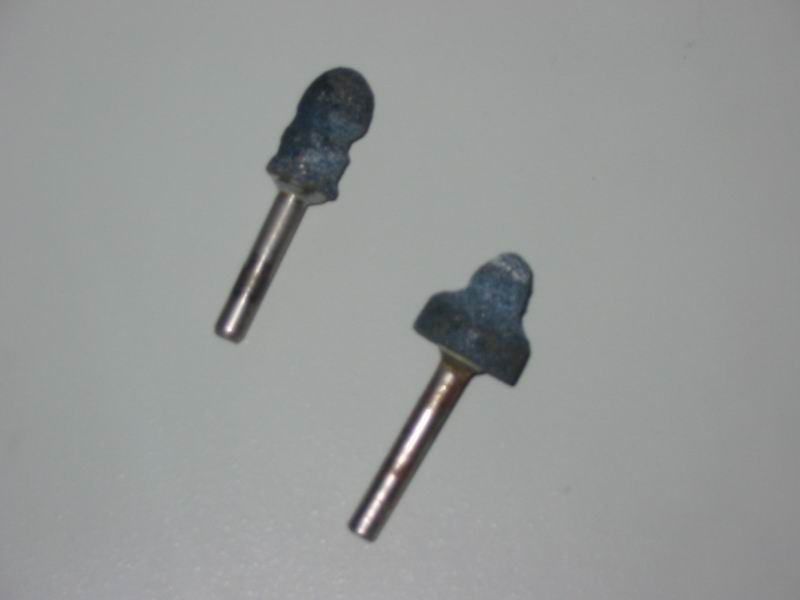
The running water was not so kind
to my grindstones, however. |
 |
|
 |
| With
the modification of the case finished I could finally start building in
the new motherboard and other stuff. For specifications of the new PC have
a look here. |
|
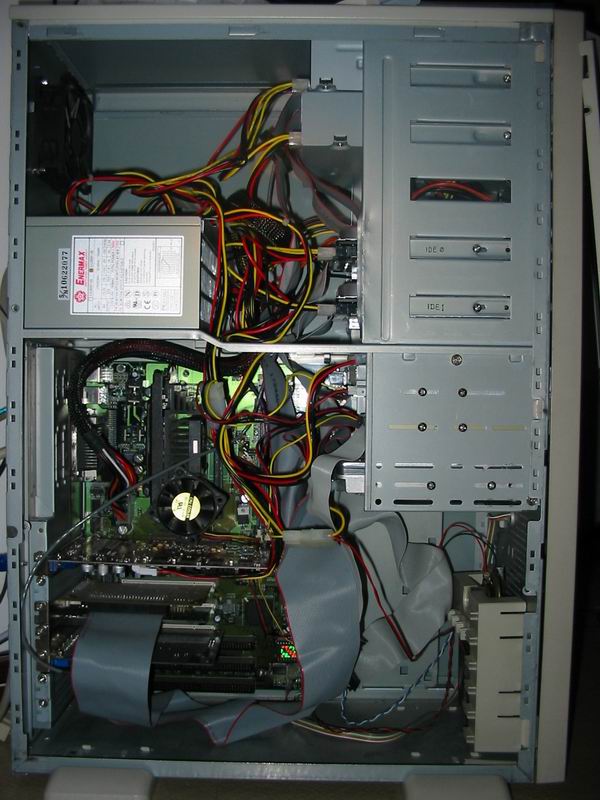
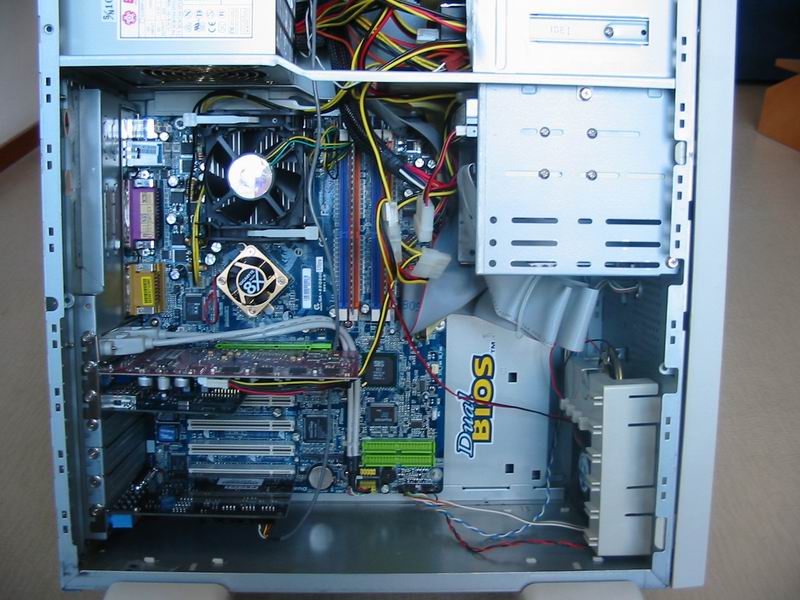
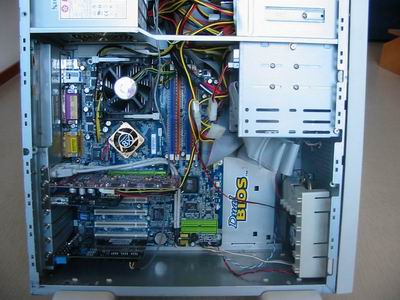
And here it is, ready for use. Already it looks a lot less cluttered
then the old PC. Almost makes me sorry there is no window in my case,
but since the PC sits under my desk and this side faces away from the
room, it would be useless anyway.
|
 |
|
 |
|
After a week or so it is time to get rid of the conventional
cooling and start to work on the water-cooling. I started off with the
lapping or polishing of the water blocks. Even though Danger Den blocks
are "Machined and Lapped to 600 grit" I can clearly see scratches.
These will fill with air and thus decrease cooling efficiency. Copper
is a relatively soft metal and easy to lap. I used sandpaper from the
local hardware store with grids of 600, 800, 1200 and 1500.
|
|
And here they are, look at them shine! :-) Lapping is actually somewhat
of a controversial subject. Many believe the effect on the temperature
is negligible, especially if you are also using a thermal paste, like
Artic Silver.
I chose to lap anyway, just for the fun of it. Since I never used my
water-cooling before lapping I cannot say anything about the effect of
lapping.
|
 |
|
 |
|
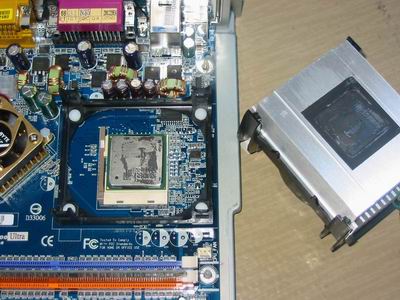
Next step is the removal of the CPU fan and the frame that holds it down
from the motherboard. First you take out the four little white pins and
then you gently squeeze and push the black pins from the back of the motherboard.
The frame should come off quite easily.
After a little less than a week the thermal grease that is on Intel's
cooler in the box has done it's work well, some of it is left on the heat
spreader of the CPU.
|
|
The chipset or north bridge cooler is easier to remove. Just gently squeeze
the pins from the back of the motherboard and springs pull them right
off.
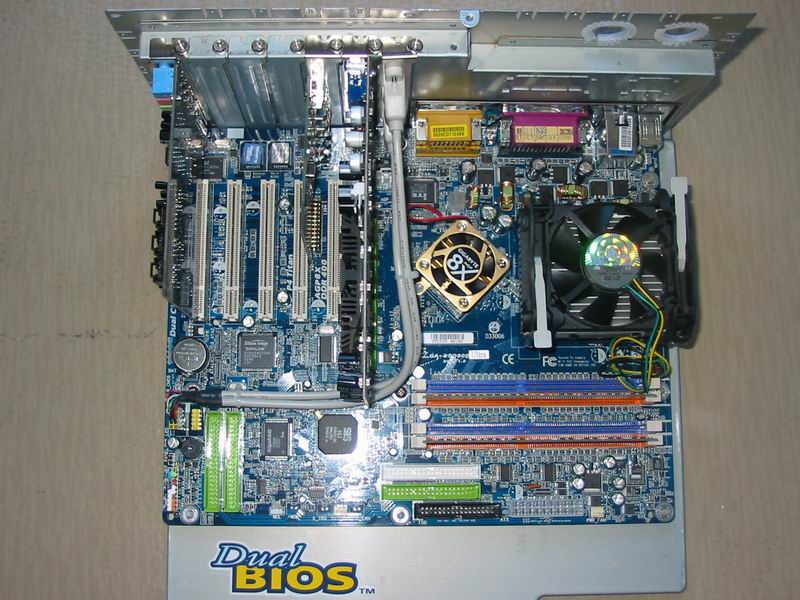
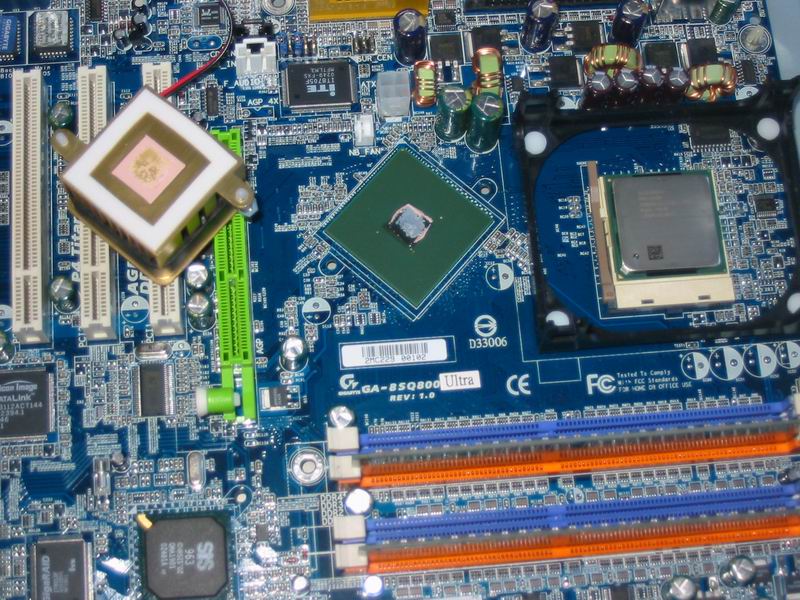
With the fan removed, I could finally confirm what I had seen with CPU-Z,
I had an early version of the GigaByte board, still equipped with the
A0 stepping of the SIS 655 chipset. Officially this does not support Intel's
hyper threading. I am not too bothered by this fact. First
of all, I have a 2.8 GHz Pentium 4, which comes without hyper threading.
Second, I believe GigaByte will come with a bios update that will support
HT even on A0 stepping.
|
 |
|
 |
|
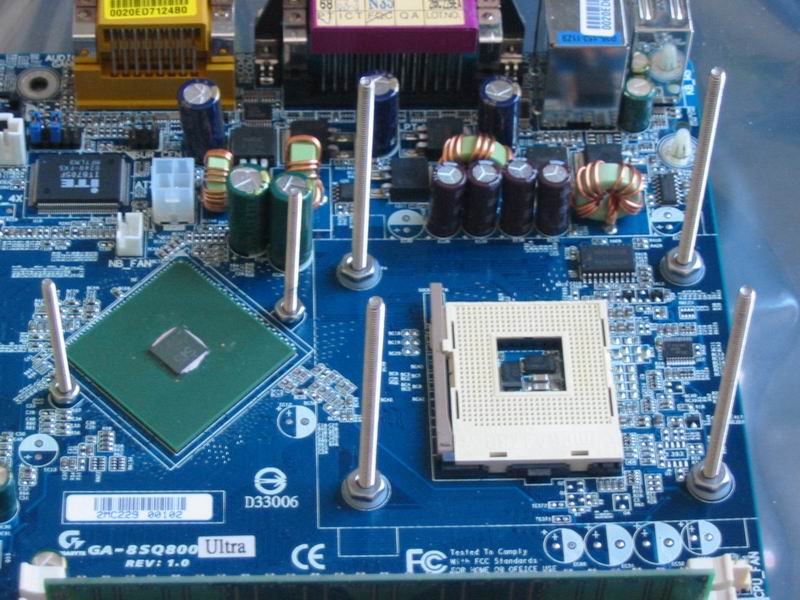
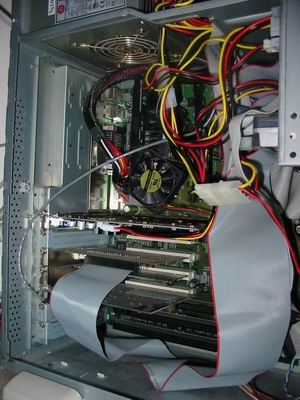
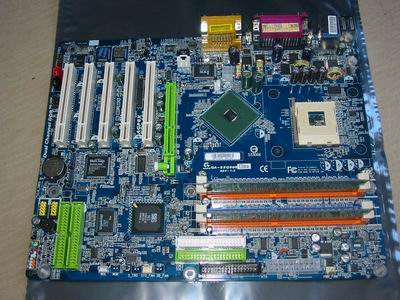
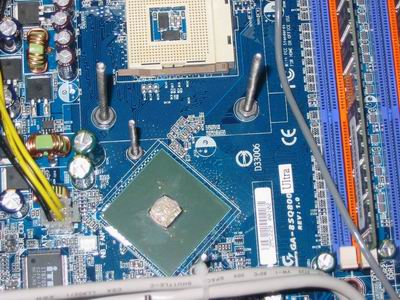
And here we have the motherboard with a cleaned north bridge and without
the CPU frame.
|
|
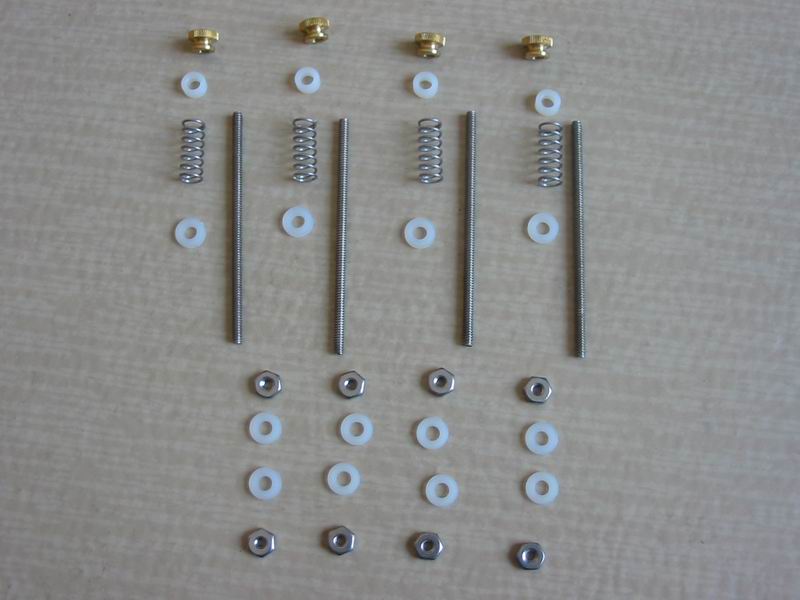
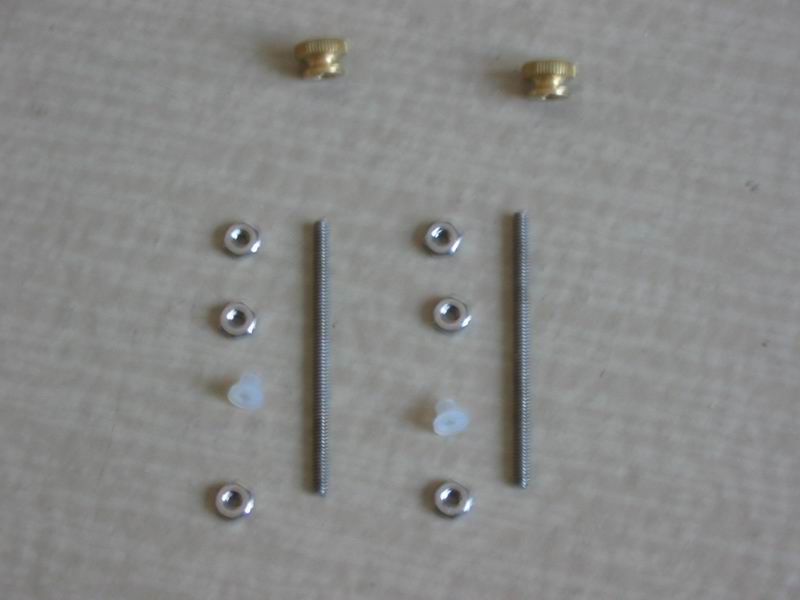
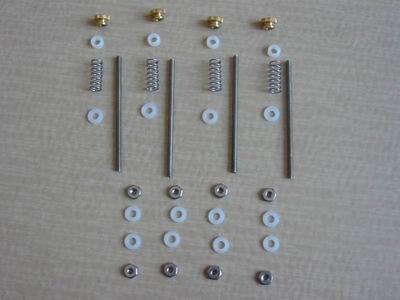
The stainless steel CPU mounting hardware is preferred above the standard
plastic one.
|
 |
|
 |
|
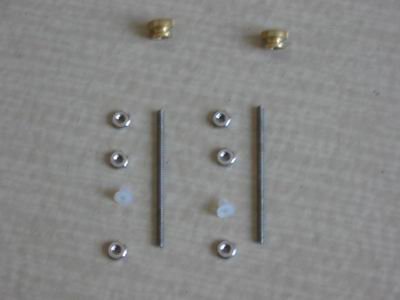
This is the mounting hardware that came with both the chipset cooler
and the video card cooler. It does not have the 4 plastic rings, like
with the CPU, but rather a plastic cylinder. I had to cut that in half
so I was still able to do bolt - ring - motherboard - ring - bolt. Also,
I am not sure why there were 6 bolts included and not just 4.
|
|
This
is how the motherboard looks with the mounting hardware installed. |
 |
|
 |
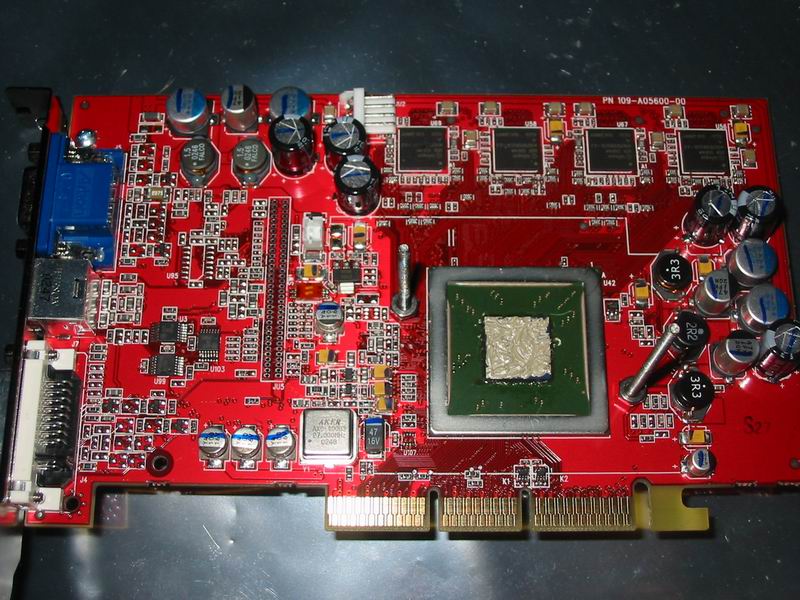
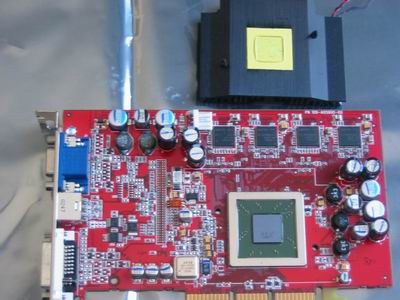
The video card cooler is held down
much like the CPU frame. First remove two pins and then gently squeeze and
push the pins from the back of the card. Never use too much force, it is
very easy to damage the core. If you have problems you could put your card
in the freezer, in an ESD bag of course. After about an hour the thermal
paste becomes brittle and the heat sink is easier to remove.
|
|
After adding the mounting hardware I tried to fit the cooling block and
I ran into my first major problem. The fitting was too big and rested
on top of some of the other components on the video card PCB. Time to
improvise!
|
 |
|
 |
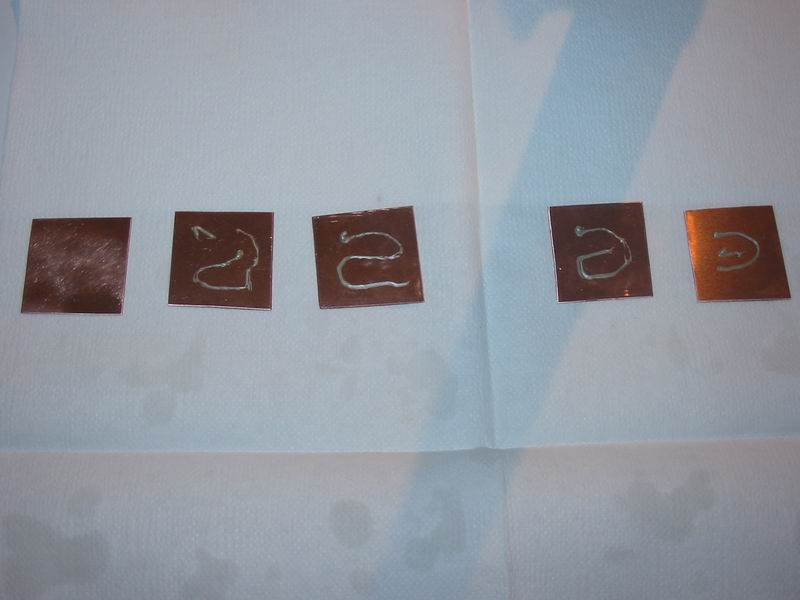
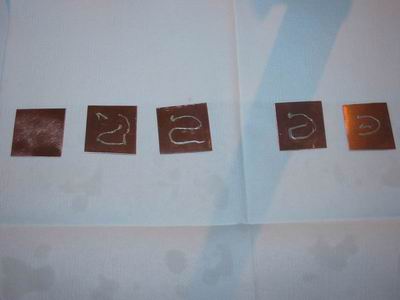
From the local hardware store I bought a copper
plate (330 x 330 x 0.5 mm was the smallest I could get) and with a saw I
took out 5 squares the size of the GPU. After lapping them I added some
Artic Silver and left them for about an hour tightly pressed between two
pieces of wood in my bench-vice.
|
|
Then I cleaned the core and added
some Artic Silver. Note: only after finishing the whole project I found
out I used way too much thermal paste. Artic Silver has put an instructions
page on the internet, which you can find here. |
 |
|
 |
| Then
we add the 2.5 mm spacer and add some more thermal compound (again,
the amount shown here is too much) |
|
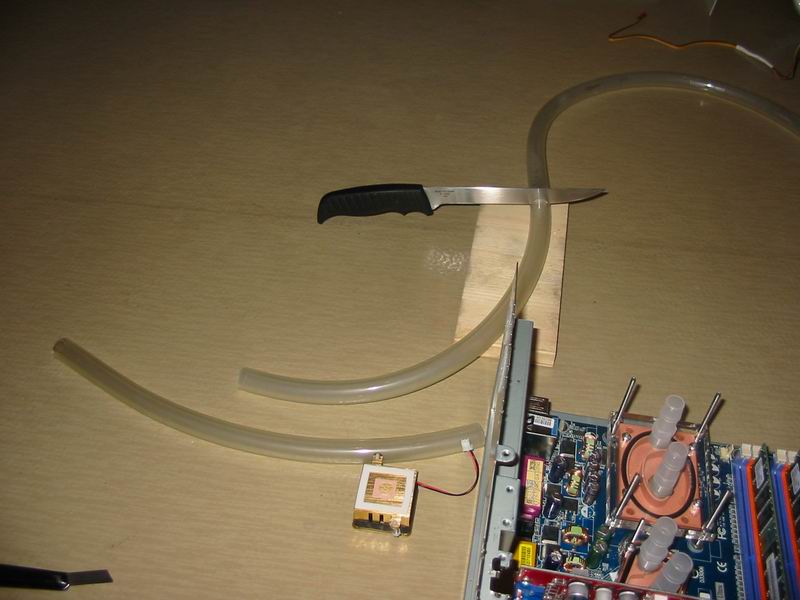
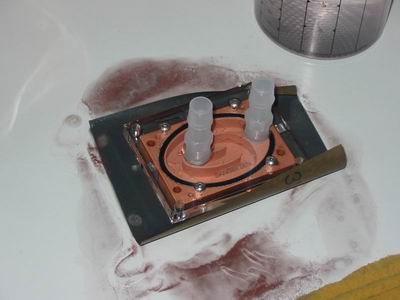
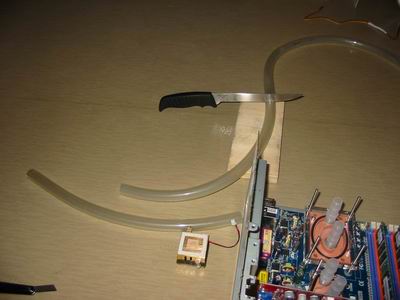
Now that I exactly know what comes where I can start cutting the hose.
|
 |
|
 |
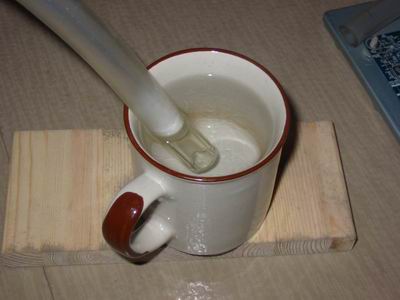
To make the hose slide smoothly
over the fitting you should dip the end of it in a cup of boiling water.
|
|
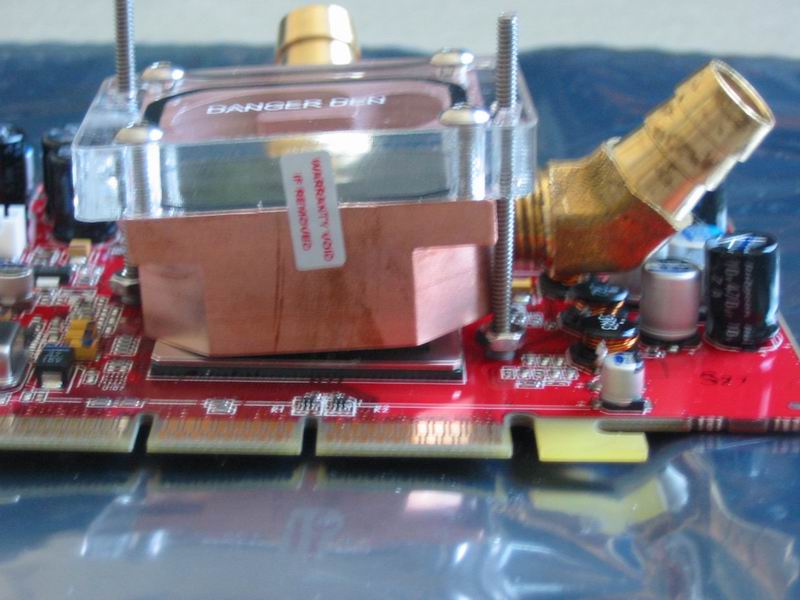
This is the GPU block, complete
with hoses and hose clamps. |
 |
|
 |
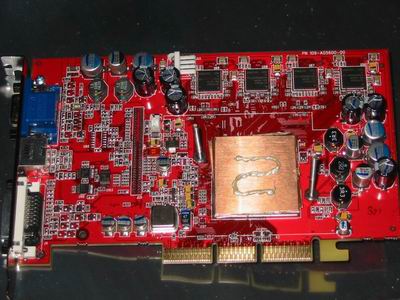
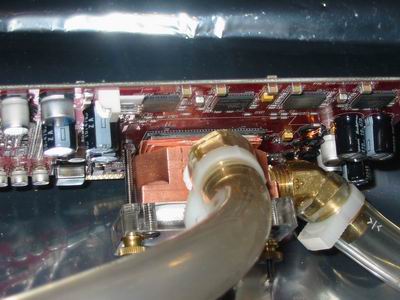
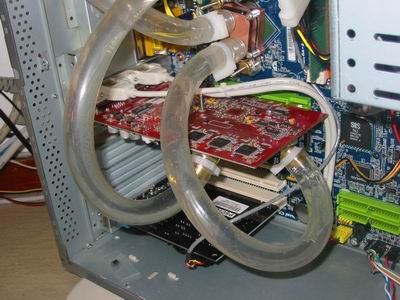
Place and secure the GPU block on
the video card by turning the bolts really tight. As you can see, the spacer
is big enough so the fitting no longer touches the components on the card.
|
|
Next step: add Artic Silver to the
north bridge. |
 |
|
 |
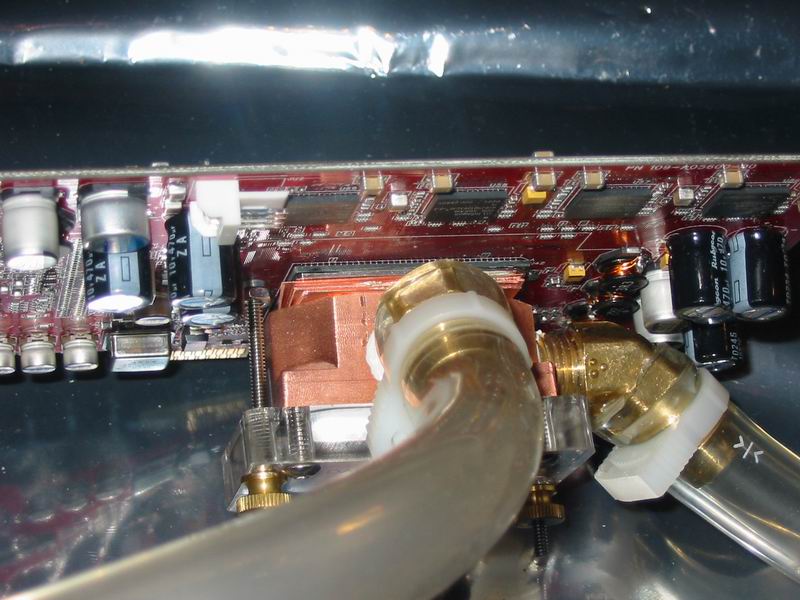
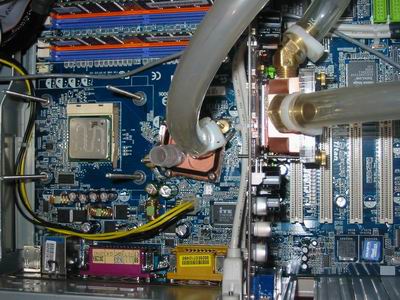
| Here
the hose from the GPU block is already connected to the NB block. Also the
CPU is in the motherboard and thermal paste is applied to it. |
|
You get the picture: install the block, cut the hose to the right size,
warm the ends in boiling water, slide over the fitting and secure with
a hose clamp.
During the wet test I noticed that when I pressed down on
the pump at a certain place the rattle it produced was a lot less. So
I used an eraser and some ty-wraps to constantly apply pressure to that
point. It looks a bit funny, but it works! :-)
|
 |
|
 |
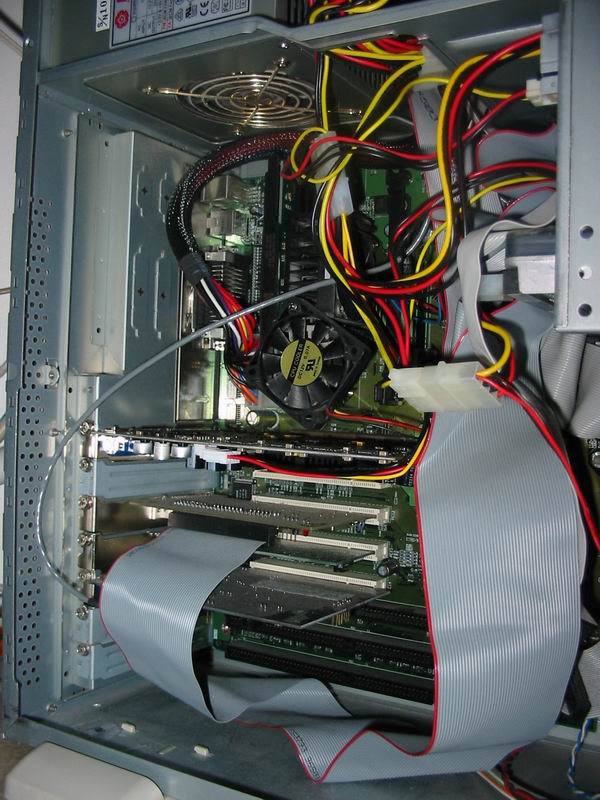
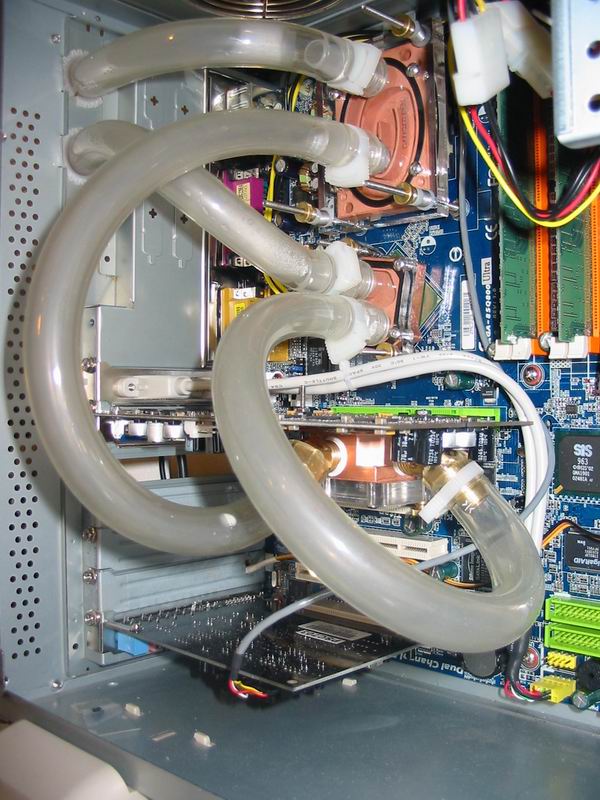
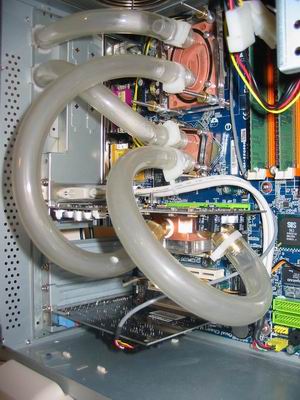
| A close-up of the motherboard with
everything connected. The hose is pretty thick, thicker than usual hoses,
and looks massive. But it also makes it very sturdy and there is no risk
of the hose collapsing into a sharp bend. |
|
And here isthe magic moment: switching on the water-cooling for the first
time!
To be sure everything is connected correctly and that there
is no leakage you should let the water-cooling run for a couple of hours
without turning on your PC. Even better is to let it run outside the computer
case, but in my situation that was not possible. Also, I had found the
hose clamps to be very reliable during wet test.
|
 |
|
 |
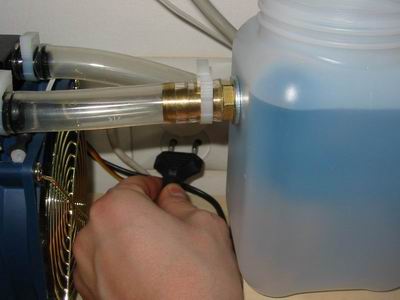
If you look closely you can see
major air bubbles in the system, especially after the video card. A reservoir
is a big advantage in getting the air bubbles out of your system. This way
you are sure the pump is always fed 'bubble free' water. The first time
you switch the system on, the hoses are full of air of course.
|
|
Adding of WaterWetter did two things:
first of all it gave the whole system a funky color, but also the air bubbles
were gone immediately! After only a couple of hours the water loses most
of its tint and the water is now almost transparent again. |
 |
|
 |
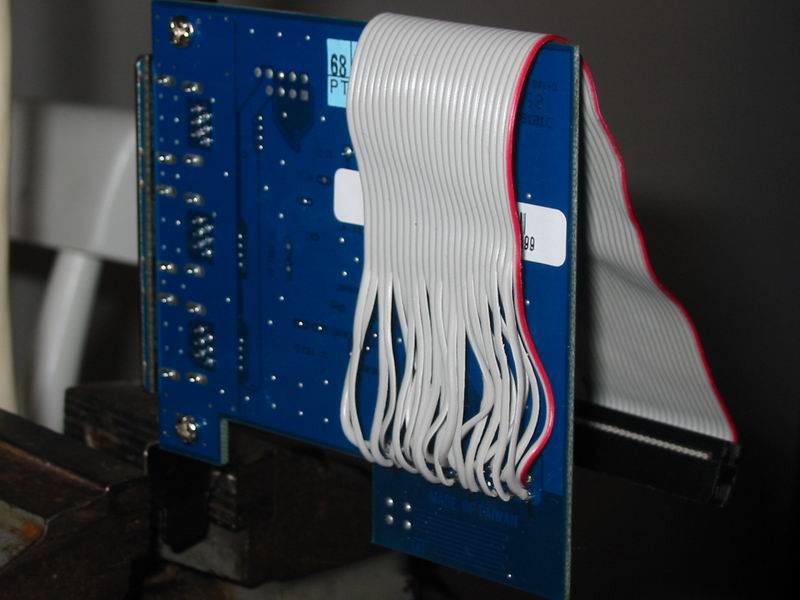
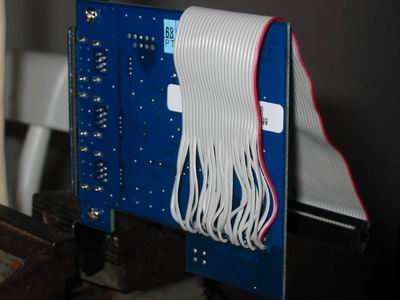
Now that the water-cooling was running
and the PC not yet, I noticed a new problem. The firewire card did not fit
anymore! Water-cooling will cost you a PCI slot, this is a known fact. GigaByte
cleverly designed their motherboard so that the slot on the back of the
case can be used even if the PCI slot cannot. Unfortunately, the Danger
Den Radeon block is larger than most (and my 5 strips of copper didn't really
help) and, even without the bolt, is too large for the firewire card to
fit there.
|
|
Time
to do some more improvising. I decided to use an old floppy cable to 'extend'
the connector. A floppy cable has 34 wires but I only need 24. And the 3.5"
floppy connector fits perfectly over the pins on the motherboard. |
 |
|
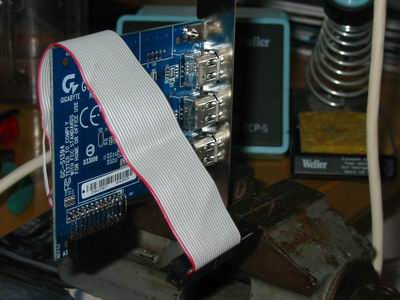 |
I was unable to solder the cable on the connector,
so I had no other option than to go all the way over the card and solder
them on the back directly on the pins.
|
|
The cable is long enough tough,
even to go over any other cards that might be added to the system later. |
 |
|
 |
|
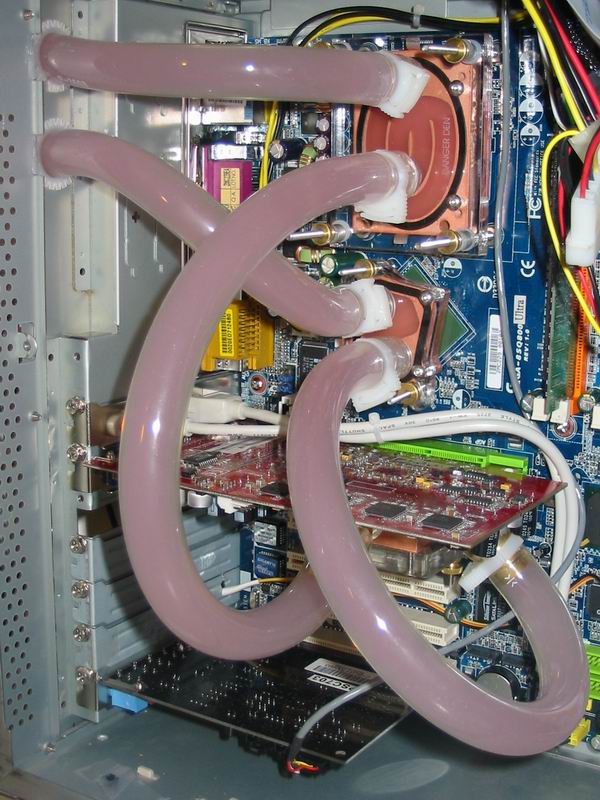
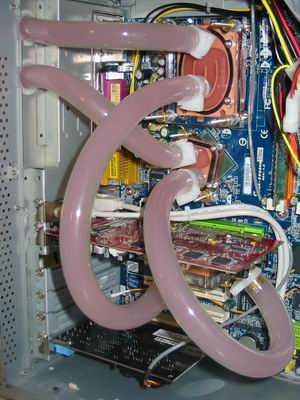
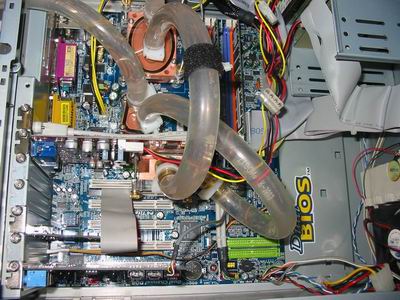
And this is the complete system,
including the firewire card.
The black strip on the hose
is a piece of soft fabric so the side panel can smoothly slide over
it when opening and closing the case.
|
|
And here is the whole system in
full operation. The first time I switched on my PC, it beeped loudly and
I feared for the worst, but all I had forgotten was to hook up the extra
power connector on the video card. If you forget that, the Ati 9500 Pro
will protest with beeping loudly and a blinking message on the screen. Other
than this little incident the system has been running perfectly. |
Epilogue:
I thought the Hydor pump would be a cheap alternative for the Eheim pump.
Unfortunately it had a 50 Hz hum and also a rattle that proved to get louder
over time. Especially in a setup like this, where the pump is outside the
case, it is very annoying. Fortunately, the store where I bought the pump
was willing to exchange it for the Eheim 1048. With only half the capacity
of the Hydor (600 l/h in stead of 1200 l/h), it took at least 10 minutes before
the air bubbles were out of the system. Temperature-wise, however, there is
absolutely no difference! And the Eheim is so quiet that I have to touch it
to see if it is working or not. Heaven! :-) It also runs a lot less hot, compared
to the Hydor.
I have to say this has been the most fun project I have ever done. It all
started many months ago with reading reviews and forums on the internet, then
deciding what and how I wanted it and then finally buying and building the
system. I am very pleased with the result. It looks great and the performance
is equally great. When the computer is idling, temperatures are between 25
and 28 degrees Celsius, and I have never seen temperatures above 35 degrees,
even after a good deal of Quake III. The only thing I am not too happy about,
is overclocking. I had expected a little more, but my Pentium 4 2800 won't
go above 3207 MHz (FSB 153).
Water-cooling is more than just an alternative way of cooling your PC. It
is not something you do overnight, nor is it for the faint at heart. But some
skills, the proper tools and a healthy dose of patience will get you far.
And it helps if you can get help or advice from people who have some experience
in this field. For me the
gathering of tweakers, a Dutch tech forum of the tweakers.net
tech news website proved invaluable. They were truly a great source of information
and inspiration. There are also sites like this in English and my advice is
to make use of them.
Lessons learned:
- Water-cooling is certainly not cheap, but be careful with the parts you
try to save on.
- Be prepared for 'unexpected challenges'
- Think well before you act. And when in doubt, don't!
- Read, read, read. I cannot stress this enough. The internet is an invaluable
source of information. Use it well.
- You are never finished. There is always something else to tweak or to improve
;-)
Even though the water-cooling is running just fine, I still think there is
too much noise coming from my PC. The hard drives produce a lot of heat and
with a lower airflow (less fans in the case) the smart fans in the Enermax
PSU sometimes have to work hard to get rid of the heat inside.
So my next project? Sound insulation? Expanding the water-cooling to the
hard drives? ... Who knows?